This section includes:
|
Note: Before implementing this channel integration, contact your Account Manager for FortiMail Workspace Security to make sure that this functionality is included in your current FortiMail Workspace Security license. |
About the Salesforce integration
FortiMail Workspace Security can be integrated with various products. This page explains what configurations are required to integrate FortiMail Workspace Security with Salesforce - to enhance your Salesforce security. This page describes what must be performed by FortiMail Workspace Security Support and what must be performed by you, the customer, to perform the integration.
When you integrate FortiMail Workspace Security with Salesforce, FortiMail Workspace Security scans files that are uploaded to your Salesforce environment. Details of the scans are included in the Scans page in FortiMail Workspace Security. Remember to click the Salesforce filter icon [ ] to show only Salesforce scans.
Integration of FortiMail Workspace Security with Salesforce requires the installation of the Salesforce-FortiMail Workspace Security app. A summary of the scans performed is shown in the Scanned items tab of the Salesforce-FortiMail Workspace Security app.
By default, the FortiMail Workspace Security-Salesforce integration scans all files that are uploaded into Salesforce. It is possible to specify that only specific uploads are scanned. For details, see Defining the scope of Salesforce scanning below.
-
For information about integrating FortiMail Workspace Security with other products, see Bundles and Channels.
About quarantining Salesforce files
It is possible to configure the FortiMail Workspace Security-Salesforce integration to quarantine files. By default, a file will be quarantined when a scan assigns a malicious verdict to the file, or when the FortiMail Workspace Security IR Team changes the verdict of a scan to malicious. When a file is quarantined, it is deleted from Salesforce, and a copy of the file is stored on Fortinet servers - for recovery purposes. It is not possible for users to access or download a quarantined file.
|
Note: In Step 4 below, FortiMail Workspace Security Support can configure the specific scan verdicts [malicious or spam] that trigger quarantine. |
When a malicious file is found and quarantined, a notification email is sent to the owner of the quarantined file. You can configure FortiMail Workspace Security to send an email to admin users when a file is assigned a malicious verdict and the file is quarantined. For details, see Alerts. If you - or a user - thinks that a quarantined file is actually clean, use FortiMail Workspace Security to request the FortiMail Workspace Security IR Team to re-analyze the file. If the FortiMail Workspace Security IR Team finds the file to be clean - and they change the verdict accordingly - the file will be removed from quarantine, and again made available to users in Salesforce, in its original location. For details, see Requesting an investigation.
Quarantine configurations are set in Step 4 below, by FortiMail Workspace Security Support.
Prerequisites
In order to perform the required integration with FortiMail Workspace Security, make sure that you have the following prerequisites:
-
Salesforce Essentials
-
Administrator rights in Salesforce
-
Admin role in FortiMail Workspace Security
The Salesforce integration procedure
Perform the procedure below to integrate FortiMail Workspace Security with Salesforce.
|
|
Performed by |
|---|---|
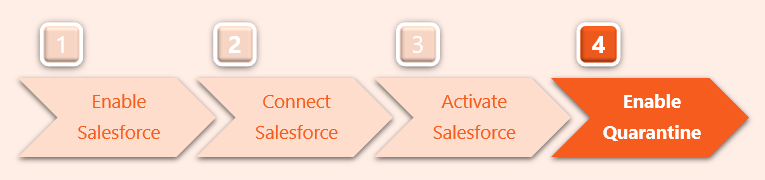
|
Step 1 - Enabling Salesforce |
FortiMail Workspace Security Support |
|
Step 2 - Connecting Salesforce |
A FortiMail Workspace Security admin-user |
|
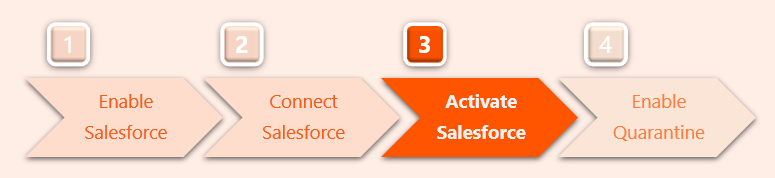
Step 3 - Activating Salesforce |
A FortiMail Workspace Security admin-user |
|
Step 4 - Enabling quarantine |
FortiMail Workspace Security Support |
Step 1: Enabling Salesforce - Internal
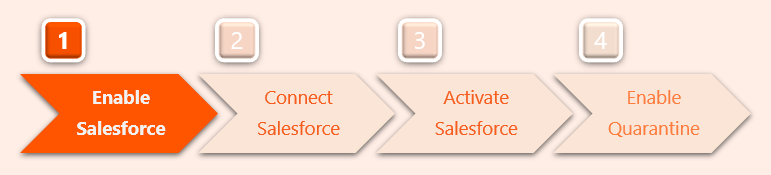
This step connects Salesforce with FortiMail Workspace Security in the FortiMail Workspace Security internal system.
-
This step must be performed by FortiMail Workspace Security Support.
-
FortiMail Workspace Security Support must supply the customer with the token-ID that will be required in Step 2.
-
FortiMail Workspace Security Support will inform you when this step has been completed. You can then continue with Step 2.
Step 2: Connecting Salesforce
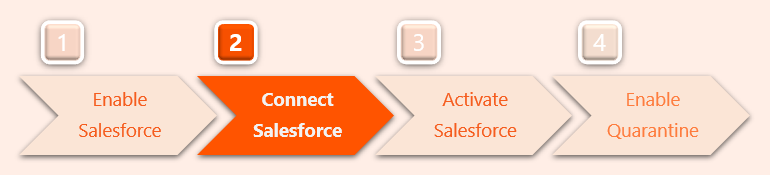
This step enables the Salesforce integration with FortiMail Workspace Security.
-
This step must be performed by you, the FortiMail Workspace Security admin-user.
-
You must be an Admin user in Salesforce.
-
Perform this step only after FortiMail Workspace Security Support has completed Step 1 above.
-
You'll need to receive a token-ID from FortiMail Workspace Security Support to complete this step.
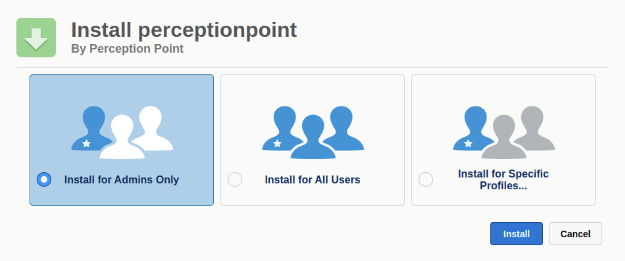
Installing the "Salesforce-Perception Point" app
After Salesforce has been enabled [Step 1], you must add the "Salesforce-Perception-Pont" app to your Salesforce installation.
-
Log-in to Salesforce as an Admin.
-
Go to the installation URL for the "Salesforce-Perception Point" app.
Note: For Salesforce sandbox installations, use this installation URL.
-
Select Install for Admins Only.
-
Click Install.
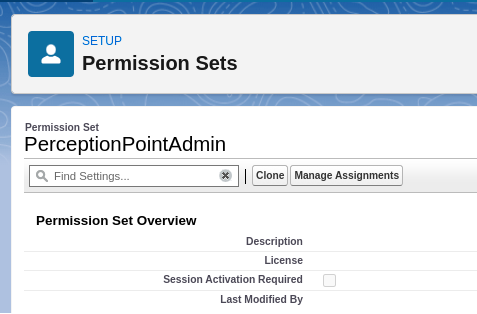
Configuring the Salesforce-Perception Point app
Perform these tasks after the Salesforce-Perception Point app is installed:
-
In Salesforce, go to Setup > Permission Sets.
-
Click PerceptionPointAdmin.
-
Click Manage Assignments.
-
Select the required Salesforce admin user, and grant the PerceptionPointAdmin permission sets to the user.
Note: If you are planning to add the Fortinet Scan Status UI component [see Adding scanning details to Salesforce pages below], repeat this step with the PerceptionPointStandardUser permission set - and grant the PerceptionPointStandardUser permission set to all users that will use this component.
-
In Salesforce, click the App Launcher icon [
 ] in the top left corner.
 -
Search for the Perception Point app.
-
Under Apps, click Perception Point to open the Perception Point app.
-
Select the correct Perception Point URL for your organization. The correct Perception Point URL depends on the environment in which your organization is located.
 To verify the environment of your organization:
-
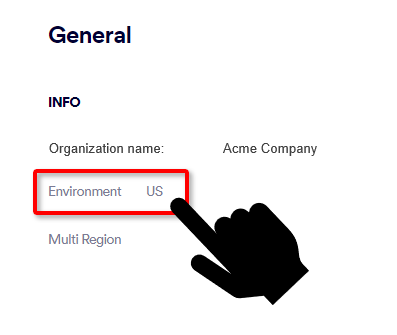
Go to Settings > Account.
-
The Environment of your organization will appear under General > Info: US,EU, or AU.
-
Select the URL option that is "blank" if your environment is "US" [see the graphic below]
-
Select the URL option that includes "eu" if your environment is "EU"
-
Select the URL option that includes "aus" if your environment is "AU"

Note: The first three URLs in the list are not currently used - they are for future development.
-
-
Under Token, enter the token for your installation, using the following format: Token <token-ID>
That is, first the word Token (with a capital T), followed by a space, followed by the token-ID.
For example: Token 123947y37532459873987
What is the Token?
The token is the API key of an admin-user that has the Administrator role. You can get the required API key from the Settings > Profile page - under Security. [See API Key]
-
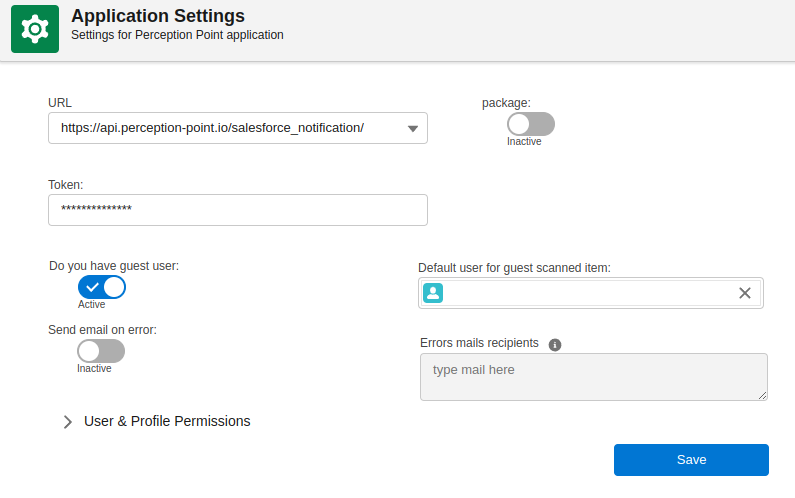
If you have any guest users in Salesforce, enable "Do you have a guest user" - and then select the user that will be assigned to scanned items that were created due to activity of a guest user.
-
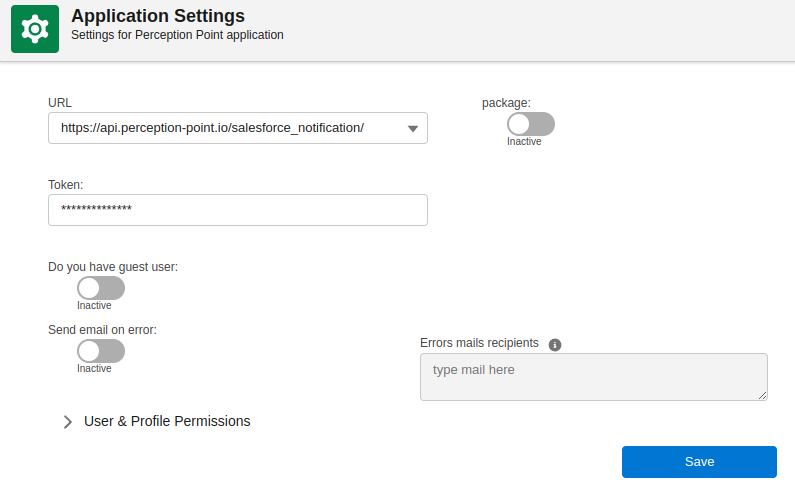
By default, Send email on error is not enabled. You can enable Send email on error, and then enter the email address to which error-emails will be sent. Enabling Send email on error is recommended for "debug mode" only.
-
Enable Package. This control enables or disables the Salesforce-FortiMail Workspace Security integration.
-
Click Save.
Step 3: Activating the Fortinet- Salesforce integration
This step activates the Salesforce integration with FortiMail Workspace Security.
-
This step must be performed by you, the Fortinet client.
-
You must be an Admin user in Salesforce.
-
Perform this step only after you have completed Step 2 above.
Perform these tasks in FortiMail Workspace Security:
-
In the left navigation menu, select Settings > Bundles and Channels.
-
Under Assigned Bundles, make sure that at least one bundle is assigned that includes the Salesforce channel.
Note:
-
If a bundle that includes the Box channel is assigned, then Box will appear in the list of channels under Enabled Channels.
-
You can click Bundles Settings, that is located on the right of each Assigned Bundle, to see which channels are included in a bundle.
Note: You can click Bundles Settings, that is located on the right of each assigned bundle, to see which channels are included in a bundle.
-
-
Under Enabled Channels, locate "Salesforce" and then click "Activate". You'll be redirected to sign-in to Salesforce.
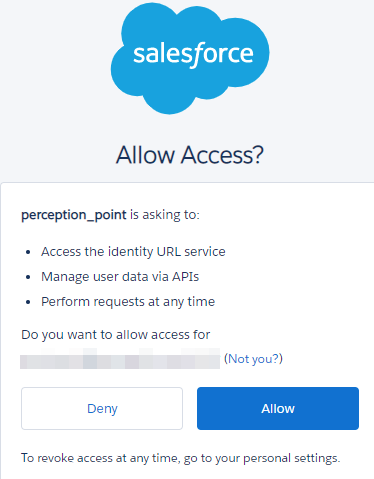
-
Click Allow to grant permissions to Fortinet.
Step 4: Enabling quarantine
This step is performed by FortiMail Workspace Security Support after Step 3 has been completed.
In this step, Fortinet configures the quarantine requirements for the FortiMail Workspace Security-Salesforce integration.
By default, a file will be quarantined when a scan assigns a malicious verdict to the file, or when the FortiMail Workspace Security IR Team changes the verdict of a scan to malicious. FortiMail Workspace Security Support can change the verdicts that trigger quarantine.
-
After you have completed Step 3, contact FortiMail Workspace Security Support [support@perception-point.io] and ask them to perform Step 4.
You can include the text template below in your email:
Subject: Step 4 - Enabling quarantine for our Salesforce integration
Hi FortiMail Workspace Security Support Team,
Organization name: <Your organization name> as it appears in FortiMail Workspace Security
We are performing the integration with Salesforce.
We have completed Step 3.
Please can you perform Step 4 - Enabling quarantine.
[Internal Reference: 1151]
Please let us know when this has been done.
Thank you
-
FortiMail Workspace Security Support will inform you when Step 4 has been completed.
Your integration between FortiMail Workspace Security and Salesforce is now complete... 
Make sure that Salesforce now appears as "Active" under Settings > Bundles and Channels > Enabled Channels.
Viewing scanned items
The Salesforce-FortiMail Workspace Security app lets you see a list of all the items that were scanned by FortiMail Workspace Security. The data shown is synchronized with the data in the Scans page of FortiMail Workspace Security. For any entry in the list, you can click the Scanned Name to open the corresponding entry in FortiMail Workspace Security.
To show the list of scanned items:
-
Open the Salesforce-FortiMail Workspace Security app.
-
Click the Scanned items tab.
Defining the scope of Salesforce scanning
|
Note: This feature is currently in beta phase. To implement this feature as a beta user, contact your Account Manager for FortiMail Workspace Security. |
By default, the FortiMail Workspace Security-Salesforce integration scans all files that are uploaded into Salesforce. It is possible to specify that only specific uploads are scanned. To achieve this, you can specify profiles and users to be included or excluded from scanning.
To specify profiles and users for scanning:
-
In Salesforce, open the FortiMail Workspace Security app.
-
In the Application Settings tab, click User & Profile Permissions.

-
Use the available controls to specify which profiles and users should be included or excluded from scanning.
Adding scanning details to Salesforce pages
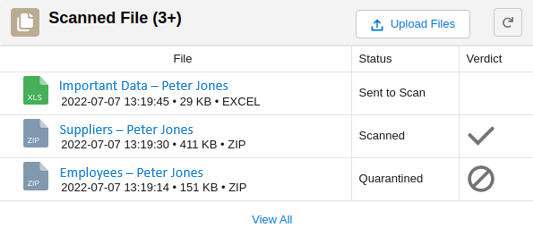
You can add the FortiMail Workspace Security component to any Salesforce record page. The FortiMail Workspace Security component shows details of the FortiMail Workspace Security scans that were performed on all uploaded files that are related to the specific Salesforce record, in any of the objects. The details shown include the scan status and the scan verdict.
|
Scan status |
|
|---|---|
|
Sent to scan |
The file is currently being scanned. |
|
Scanned |
The scan is complete - the verdict is that the file is clean. |
|
Quarantined |
The scan is complete - the verdict is that the file is malicious. |
-
For installation requirements and instructions, see Configuring the Salesforce-Perception Point app above.
-
For details on how to edit a Salesforce page to include the FortiMail Workspace Security component, see the Salesforce documentation.
-
For details on how to include email-to-case instances, see Enabling the email-to-case functionality below.
Enabling the email-to-case functionality
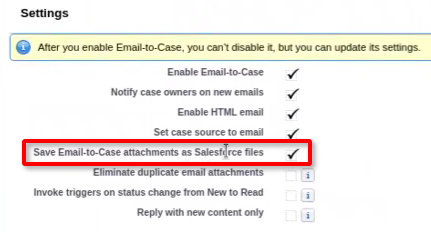
The Salesforce email-to-case feature automatically converts customer emails into cases. FortiMail Workspace Security scans the files that are uploaded in these cases. These scans will be visible in the Scanned Items view. For improved visibility, these scans can also be included in the FortiMail Workspace Security component [see Adding scanning details to Salesforce pages above]. In order for these scans to be included in the FortiMail Workspace Security component, the "Save Email-to-Case attachments as Salesforce files" setting must be enabled in Salesforce.
To enable the "Save Email-to-Case attachments as Salesforce files" setting:
-
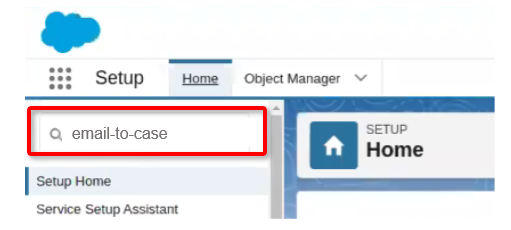
In Salesforce, click the Setup icon [
 ] and then select Setup [
 ].
]. -
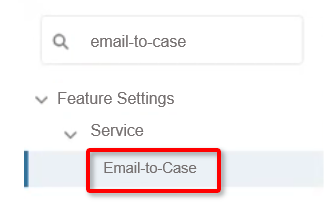
In the Quick Find box in the top-left corner, enter "email-to-case" [including the hyphens].
-
In the left navigation pane, select Feature Settings > Service > Email-to-Case.
-
Under Settings, make sure that the "Save Email-to-Case attachments as Salesforce files" check box is selected.
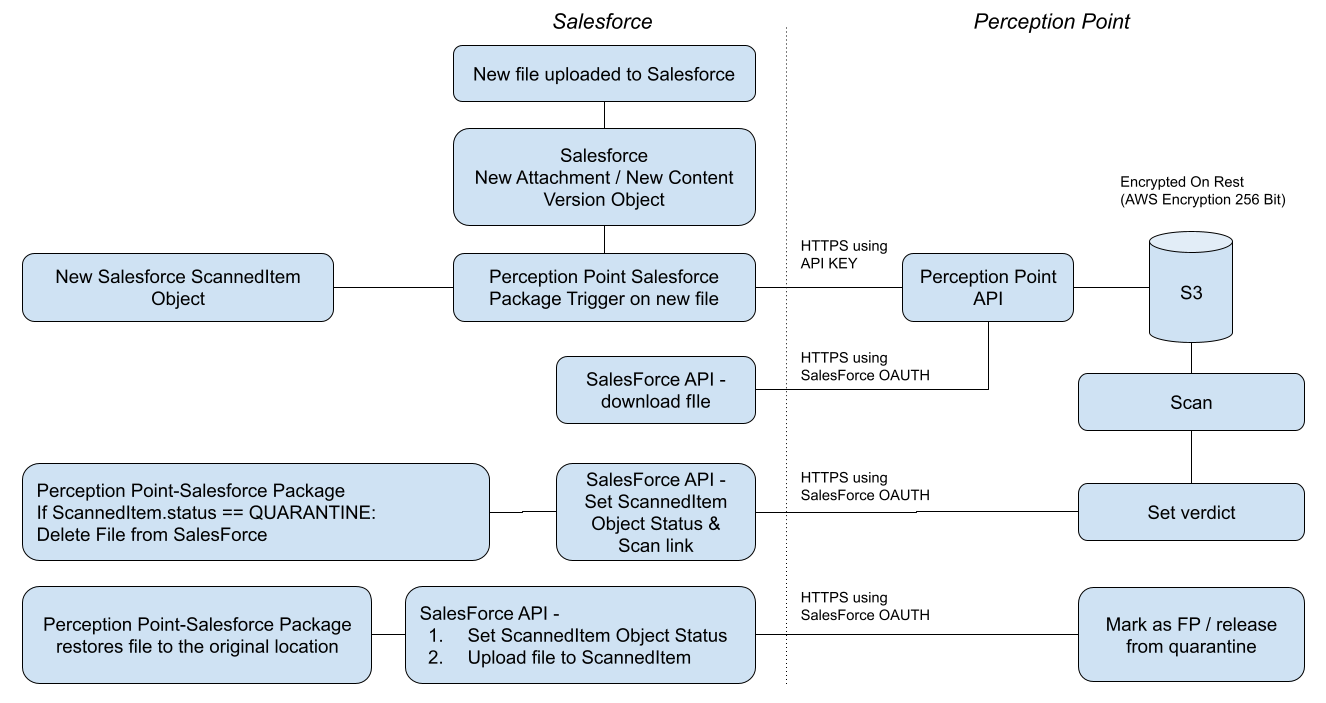
Flow chart diagram
Hover your cursor over the graphic below to enlarge it ![]()
See also:
