This page includes:
Deployment requirements
Before you begin the extension deployment process, make sure that all the requirements are in place. For details on the requirements, see Installation requirements.
About updating
-
After initial installation, the extension is periodically automatically updated - as required. No manual input for updating is required. The automatic updates are usually performed within 24 hours of the update becoming available.
-
Updates for extensions for the various browsers [Microsoft Edge, Google Chrome, etc] may be performed at different times. This is due to the extension review times in the various stores in which updates for the extensions are published - some stores take longer than others to approve new update versions of the extension.
Manual vs Managed deployments
The extension can be installed either manually, or by using a UEM solution - for managed deployment:
-
Manual deployment: The deployment is performed primarily by the end-user - whose browser will be protected by the extension.
For details, see Deploying the extension manually.
-
Managed deployment: The deployment is performed via a UEM solution, such as Intune, Google Workspace, JumpCloud, or Jamf.
Details about managed deployment options are described on this page.
About the managed extension deployment process
The typical managed deployment process for the extension includes the following 3 steps:
|
Step 1 |
Installing the extension on endpoints |
|
Step 2 |
Connecting the extension to the FortiMail Browser Security organization |
|
Step 3 |
Activating the extension |

Step 1: Installing the extension on endpoints
In Step 1, you'll install the extension on all browsers in your organization:
|
UEMs |
For information on how to use a UEM to install the extension, see Step 1: Installing the extension via UEM solutions [Generic]. |
|
GPOs |
For information on how to use a GPO to install the extension, see Deployment via GPOs in Active Directory. |
|
Manual |
For details about manual deployment methods, see Deploying the extension manually. |
Step 2: Connecting the extension on endpoints
After you have installed the extension on the endpoints, the extensions must be connected to the FortiMail Browser Security organization. This connection initially enables the extension to access some pre-activation settings that are defined for the organization.
-
Managed deployments: The connection is done using an organization token. For details on the connection process, see Step 2: Connecting the extension via UEM solutions [Generic].
-
Manual deployments: The connection is usually performed via an email verification code, but SAML authentication can also be configured.
Step 3: Activating the extension on endpoints
After you have installed and connected the extension on each endpoint, the extensions must be activated. The extensions function only while they are activated.
|
Note: After an extension has been activated, it will remain activated, until a user manually signs-out of the extension [if this is allowed by the enforced policy]. |
There are three methods to activate the extensions - summarized in the table below.
Extension activation methods
|
Activation method |
Description |
Supported deployment methods |
User input required |
|---|---|---|---|
|
Unattended activation |
Extensions are automatically activated. New end-users will be identified in the FortiMail Browser Security console by their work email addresses - if FortiMail Browser Security is able to determine the work email addresses. If FortiMail Browser Security isn't able to determine the work email addresses, then the end-users will be identified by their "local signed-on user names" - not by their email addresses. For details about the "unattended activation mode", see Unattended activation mode.
|
|
Never |
|
SAML |
Users authenticate using SAML. You'll need to configure the FortiMail Browser Security extension as an application in your identity provider. For details, see Identity Provider [IdP] Integration - SSO [FortiMail Browser Security]. To activate the extension, user input may or may-not be required, depending on various factors.
New users are created in FortiMail Browser Security as each user signs-in to the extension for the first time. |
|
Sometimes - depending on the scenario |
|
Manual |
Users sign-in to the extension manually. Users will need to supply their email address when requested. Thereafter, a verification code is sent to them by email. Users must enter the verification code.
|
|
Always |
|
Important:
|
Checking the extension deployment status
From the FortiMail Browser Security console
You can use the FortiMail Browser Security console to check the deployment status of the extensions for all end users.
To check that users were correctly created and extensions are activated:
-
In the FortiMail Browser Security console, navigate to the Users > Users page.
A User status of either Active or Inactive indicates that the extension for that user is installed and activated.

For details on the available user statuses, see Understanding the user status.
-
Check that the expected number of users has been created.
Note: If a user's endpoint device is not available [for example, the device is not On], the user will not be added to the FortiMail Browser Security console.
-
You can also see the FortiMail Browser Security Dashboard for an overview of the number of users that are signed-in to FortiMail Browser Security. For details, see Overview.
From the endpoints
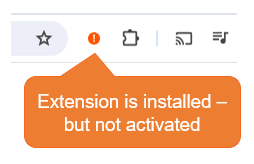
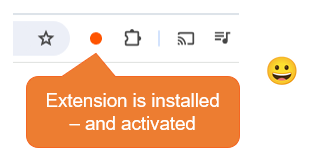
The orange "FortiMail Browser Security" icon on the right of the browser toolbar indicates if the extension has been installed, and if the extension has been activated:
|
The extension has been deployed - but not yet activated |
|
|
The extension has been deployed - and activated |
|
Sample managed deployment procedures
Below are some sample UEM procedures that can be used to deploy the organization token and the extension:
|
UEM solution |
Browsers |
Operating |
For details, see... |
|---|---|---|---|
|
Google Workspace |
|
|
|
|
Microsoft Endpoint Manager [Intune] |
|
|
|
|
JumpCloud [MacOS] |
|
|
|
|
Jamf Pro [MacOS] |
|
|
See also:
