This page includes:
About integrating Perception Point X‑Ray with an identity provider
You can integrate Perception Point X‑Ray with an external identity provider - such as Azure AD or Okta - to provide SSO [single sign-on] functionality. This integration:
-
Lets admin users sign-in to Perception Point X‑Ray using their corporate credentials.
-
Uses SAML (Security Assertion Markup Language) to allow identity providers to pass authorization credentials to Perception Point X‑Ray.
|
Note
|
For details on how to integrate Advanced Browser Security with an identity provider, see Identity Provider [IdP] Integration - SSO [ABS].
Types of admin users
There are two types of admin users:
-
Standard: Admin users that are added via an invitation from Perception Point X‑Ray.
-
SAML: Admin users that are added by Perception Point X‑Ray when the admin user first signs-in to Perception Point X‑Ray using the SSO integration.
To see a list of admin users and the type of each user, go to the Account > Admin Users page - and look for the Connection Type [Standard or SAML].
|
Note: You can simultaneously use standard [auth0] and SAML for authorization in your organization. This enables you to initially assign only a single admin user for SAML authorization - while maintaining standard authorization for all other admin users. This in turn, enables you to test that the SAML integration is working as expected, specifically for a single admin user, before rolling-out the SAML integration to all admin users in the organization. |
Propagating SSO [IdP] settings
SSO configurations that are set in a parent organization are NOT applied [propagated] to the child organizations. Access to child organizations will not be affected by configuring SSO in the parent organization. If required, SSO must be configured separately for each child organization.
Configuring an IdP integration
|
Note The instructions below apply to all identity providers - and not just to one specific provider. The instructions therefore include various non-specific [generic] options and terminology. |
To configure an IdP integration, perform the following four steps:
Step 1: Getting the SSO parameters from Perception Point Support
You'll first need to get the following two parameters from Perception Point Support - for your SAML app:
|
|
Generic parameter |
Azure AD |
Okta |
Description |
|---|---|---|---|---|
|
Parameter 1 |
Entity ID |
Entity ID (Identifier) |
Audience URI (SP Entity ID) |
|
|
Parameter 2 |
ACS URL [Assertion Consumer Service URL] |
Reply URL (Assertion Consumer Service URL) |
Single sign on URL |
This URL will be used by admin users to sign-in to Perception Point X‑Ray - after the SSO integration process is completed. |
Contact Perception Point Support [support@perception-point.io], and ask them for the required parameters. You can include the text template below in your email:
|
Subject: Implementing SSO |
|---|
|
Hi Perception Point Support Team, Organization name: <Your org name> We would like to setup SSO for our organization. Please can you send us the Entity ID and ACS URL that we require in order to create a simple SAML app in our identity provider. [Internal Reference: 1158] Thank you |
|
Note: For security reasons, Perception Point Support may prefer to send you the required data via email, and not via the Chat feature. |
Step 2: Configuring your identity provider
After you receive the required parameters from Perception Point Support [in Step 1 above], continue with the following:
-
In your identity provider, create a new, simple SAML app.
-
In your identity provider, for the new app, enter the two parameters that you received from Perception Point Support.
Step 3: Configuring the SAML integration
After you have created and configured the simple SAML app, you'll need to send some metadata about your new SAML app to Perception Point Support. There are two options available for sending this information:
Option 1:
Send the following metadata about your new SAML app to Perception Point Support:
-
Entity ID
-
SSO URL
-
Certificate
-
SLO URL (optional)
Option 2:
The required configuration details [and the certificate] are typically contained in a metadata .xml file that is created by your identity provider when you add the new SAML integration. Send the generated .xml file to Perception Point Support.
Step 4: Testing the SAML integration
After the required configuration details are received by Perception Point Support, they will complete and activate the integration. After Perception Point Support informs you that the integration is activated, you'll then be able to test the integration.
|
Note: You can simultaneously use standard [auth0] and SAML for authorization in your organization. This enables you to initially assign only a single admin user for SAML authorization - while maintaining standard authorization for all other admin users. This in turn, enables you to test that the SAML integration is working as expected, specifically for a single admin user, before rolling-out the SAML integration to all admin users in the organization. |
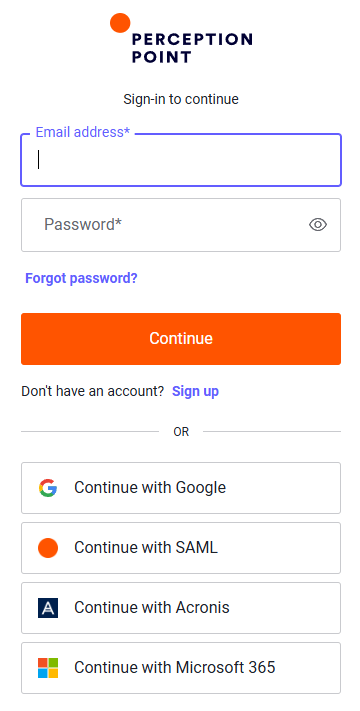
Use the following URL to access Perception Point X‑Ray:
|
Important: Admin users should click "Continue with SAML" to access Perception Point X‑Ray using the new SSO functionality.
|
Forcing SAML sign-in
It is possible to configure Perception Point X‑Ray so that all admin users will be forced to use SAML to sign-in to Perception Point X‑Ray. The standard [non-SAML] sign-in procedures won't be available, and non-SAML admin-users won't be able to sign-in to Perception Point X‑Ray.
To force SAML sign-in to Perception Point X‑Ray, you'll need to create a group of admin users in your identity provider, and give these users the ability to access Perception Point X‑Ray. Perception Point Support will then need to enable forced-SAML-sign-in for your organization.
For implementation details and assistance, contact Perception Point Support [support@perception-point.io].
|
Note If your organization is configured to force users to sign-in to Perception Point X‑Ray using SAML, then it is not possible to add [invite] new admin-users via Perception Point X‑Ray. [The Add User button won't appear - see Inviting new standard admin-users.] Instead, a new admin-user needs to sign-in to Perception Point X‑Ray using the "Continue with SAML" option, or via the SAML app. The first time a new admin-user successfully signs-in to Perception Point X‑Ray, a corresponding new admin-user will be created in Perception Point X‑Ray. |
Creating admin users after SAML integration
After setting up SAML integration for SSO, new admin users are automatically created in Perception Point X‑Ray when the admin users first sign-in to Perception Point X‑Ray. Each new admin user will have the "SAML" connection type - that is visible in the Account > Admin Users page.
-
If SAML sign-in is forced in your organization, it will not be possible to add new admin users via the Perception Point X‑Ray interface.
-
If SAML sign-in is not forced in your organization, it will still be possible [if necessary] to add new admin users via the Perception Point X‑Ray interface. Each new admin user that is created in this manner will have the "Standard" connection type - that is visible in the Account > Admin Users page.
Deleting duplicate admin users
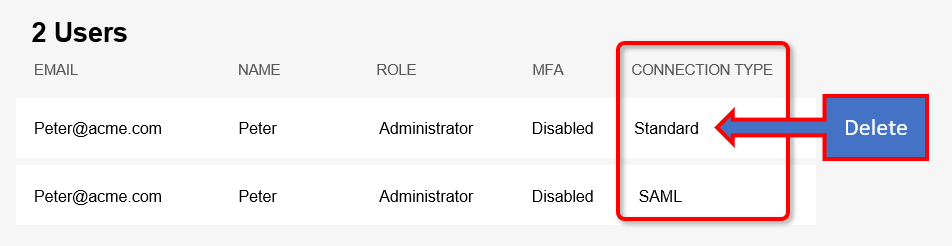
After setting up SAML integration for SSO, new admin users are automatically created in Perception Point X‑Ray when the admin user first signs-in to Perception Point X‑Ray. Each new admin user will have the "SAML" connection type - that is visible in the Account > Admin Users page.
If the admin user existed in Perception Point X‑Ray before SAML integration was set-up, then there will be duplicate entries for the admin user:
-
The new entry will have the "SAML" connection type
-
The old entry will have the "Standard" connection type
It is recommended that you delete the old "Standard" connection type admin user.
Assigning admin-user roles to new admin users
You can configure Perception Point X‑Ray so that when a new admin user is added to Perception Point X‑Ray [via the IdP integration], the new admin user will be automatically assigned a specified user role. The user role that is assigned is based on an attribute of the user. For example, you could assign the Viewer user role to new users from the Sales group, and the Controller user role to new users from the IT group. For details on the available admin-user roles, see About admin-user roles.
To enable this automatic assignment to occur, you'll need to create a new attribute for each role in your SAML app. Then send the following information to Perception Point Support, for each attribute or required user role:
-
User role in Perception Point X‑Ray
-
Attribute name
-
Attribute value
Perception Point Support will perform the required configuration, and let you know when you can test the new configuration.
See also:
