You can integrate Perception Point X‑Ray with Google Workspace. This enables Perception Point X‑Ray to protect all incoming mail.
This is the 3rd step of the procedure to integrate Google Workspace with Perception Point X‑Ray:

To enable your Google Workspace integration with Perception Point X‑Ray, some configurations must be made in your Google Workspace account. Perform these configurations as described below.
To configure Google Workspace with Perception Point X‑Ray:
|
|
|
Note: The procedures below may differ slightly depending on the versions of the products that you are using. |
Configure a Perception Point scanner host to which emails will be routed.
-
Sign-in to the Google Admin console at admin.google.com.
-
Go to Apps > Google Workspace > Gmail and then click Hosts.
[Click here: https://admin.google.com/u/1/ac/apps/gmail/hosts] -
Click Add route.
-
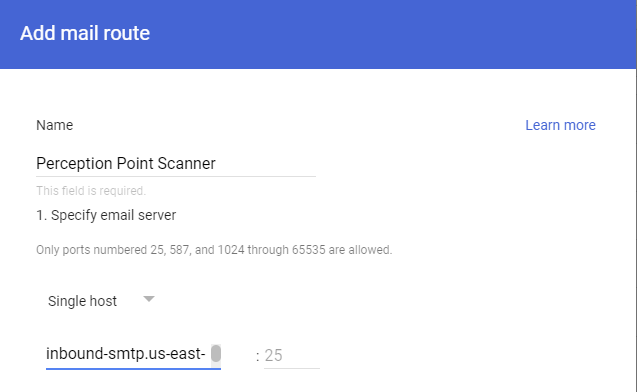
In the Add mail route dialog box, specify the following.

-
Name: Perception Point Scanner
-
Single host [name]:
 What is the environment of your organization
-
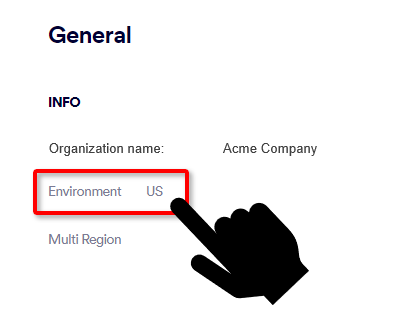
In Perception Point X‑Ray, go to Account > Preferences.
-
The Environment of your organization will appear under General > Info: US, EU, or AUS.
Multi-region enabled Multi-region not enabled For US environments:
us.mx-pp.com
inbound-smtp.us-east-1.amazonaws.com
For EU environments:
eu.mx-pp.com
inbound-smtp.eu-west-1.amazonaws.com
For AUS environments:
australia.mx-pp.com
inbound-smtp.eu-west-1.amazonaws.com
-
-
Port: 25
-
-
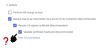
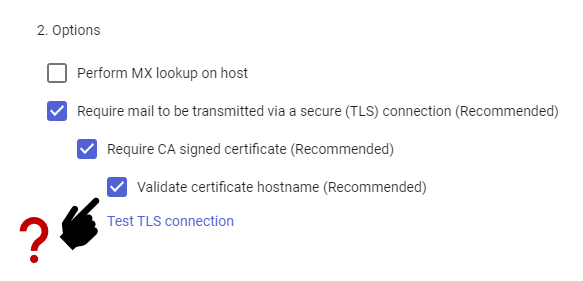
Under 2. Options:
-
Clear the Perform MX lookup on host check box.
-
Select Require mail to be transmitted via a secure (TLS) connection.
Note that Perception Point X‑Ray supports TLS 1.2
-
Select Require CA signed certificate.
-
Validate certificate hostname:
-
If multi-region IS NOT enabled, select Validate certificate hostname.
-
If multi-region IS enabled, clear the Validate certificate hostname check box.
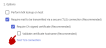
For details about multi-region, see Multi-region.
-
-
-
Click Save.
This procedure adds some Perception Point IP addresses to a safelist.
-
Sign-in to the Google Admin console at admin.google.com.
-
Click Apps > Google Workspace > Gmail.
[Click here: https://admin.google.com/u/1/ac/apps/gmail/spam]
-
Scroll down to Spam, Phishing and Malware - and select it.
-
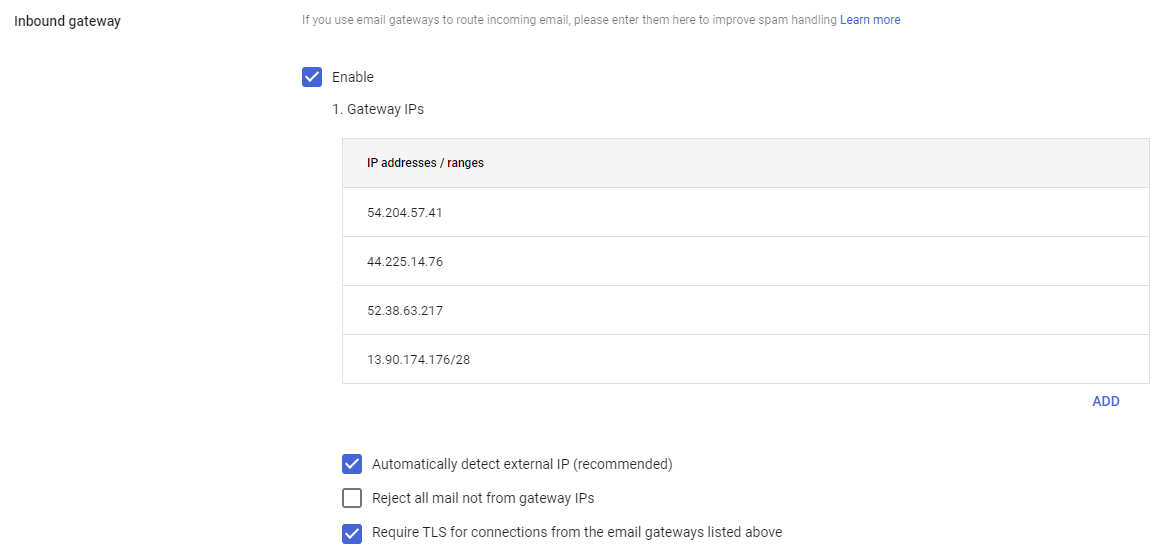
Locate Inbound gateway, hover over it, and click the Edit icon.
-
Select the "Enable" check box under Inbound Gateway - if it has not already been enabled.
-
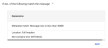
In the Description text box, enter Perception Point inbound Gateway
-
Depending on the environment of your organization, add the following IP addresses to your inbound gateway:
What is the environment of your organization
-
In Perception Point X‑Ray, go to Account > Preferences.
-
The Environment of your organization will appear under General > Info: US, EU, or AUS.
For US environments
For EU environments
For AUS environments
-
54.227.64.76
-
3.81.182.154
-
3.93.155.149
-
3.95.118.12
-
3.95.142.181
-
209.85.128.0/17
-
52.12.169.124 [required only if Muti-region is enabled]
-
99.81.216.78
-
34.249.190.60
-
108.128.137.108
-
99.80.189.20
-
209.85.128.0/17
-
52.12.169.124 [required only if Muti-region is enabled]
-
13.236.255.231
-
54.66.125.250
-
209.85.128.0/17
-
52.12.169.124 [required only if Muti-region is enabled]
-
-
Select Automatically detect external IP.
Important: Do NOT select "Reject all mail not from gateway IPs" - as this will interrupt mail flow.
-
Select Require TLS for connections from the email gateways listed above.

Note that Perception Point X‑Ray supports TLS 1.2
-
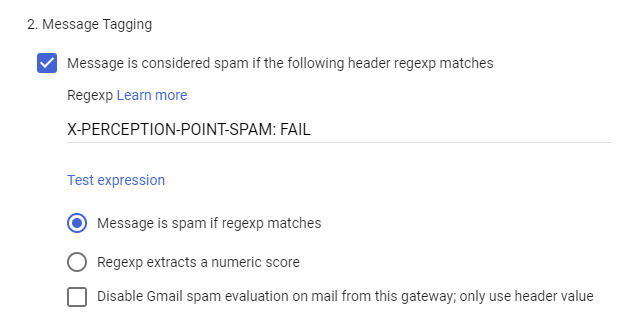
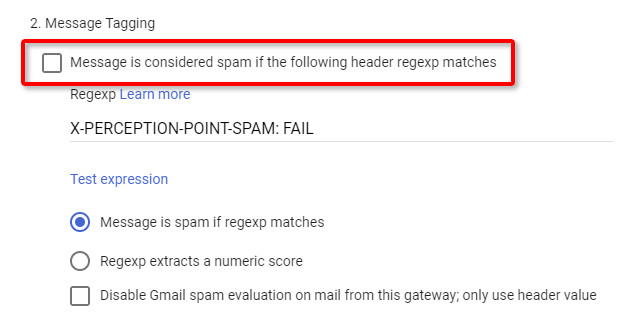
[Optional] To use the spam engine of Perception Point X‑Ray, scroll down and configure 2. Message Tagging.

-
Select Message is considered spam if the following header regexp matches
-
In the Regexp text box, enter X-PERCEPTION-POINT-SPAM: FAIL
-
Select Message is spam if regexp matches.
-
Clear the Disable Gmail spam evaluation on mail from his gateway; only use header value check box.
-
-
[At the bottom of the page, click Add Settings.]
-
Click Save.
This procedure creates a content compliance rule that sends the email to Perception Point X‑Ray.
To add a content compliance rule:
-
Sign-in to the Google Admin console at admin.google.com.
-
Select Apps > Google Workspace > Gmail.
[Click here: https://admin.google.com/u/1/ac/apps/gmail/compliance]
-
Scroll down to Compliance, and click it.
-
Scroll down to Content Compliance.
If you already have a content compliance rule, click Add Another Rule.
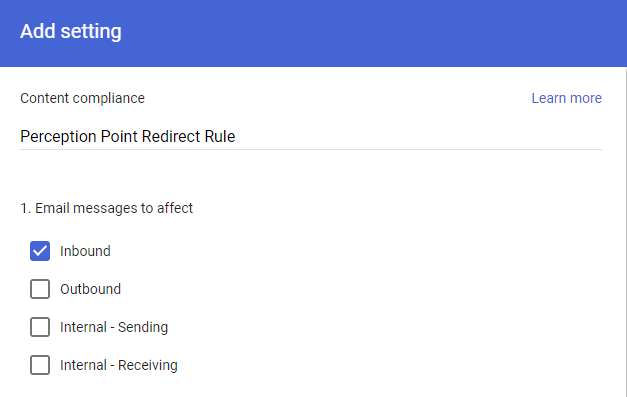
In the Add setting dialog box, specify the following:
-
Short description: Perception Point Redirect Rule
-
Under 1. Email messages to affect, select Inbound.

-
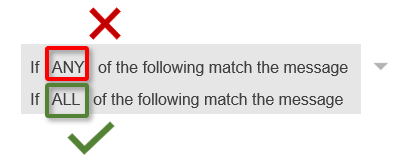
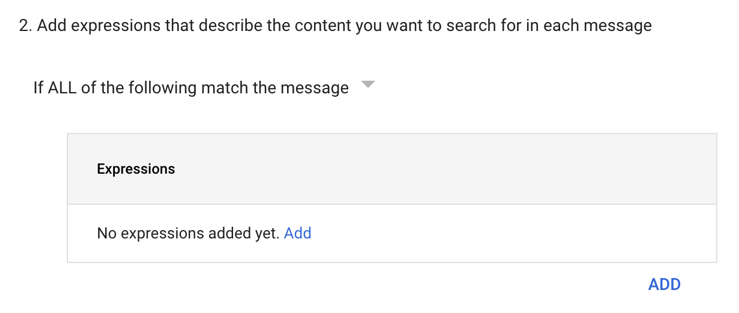
Under "2. Add expressions that describe the content you want to search for in each message", in the first drop-down menu, select "If ALL of the following match the message"

Important: Make sure to select "If ALL of the following match the message" and NOT the default "If ANY of the following match the message".
-
-
Add and configure the following two expressions:
Expression 1: Unique header
In this step, you'll add the first expression to the Perception Point Redirect Rule. This expression helps to prevent looping.
-
Under Expressions, click Add.
Fill in the following fields:

-
Advanced content match
-
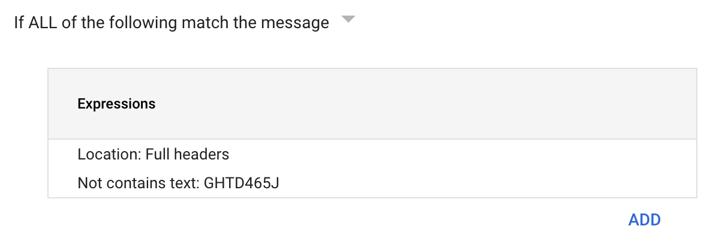
Location: Full headers
-
Match type: Not contains text
-
Content: <A unique value, at least 8 characters long>
Create a value that is unique to your organization - preferably by using a password generator such as 1Password.
For example, GHTD465J
Note:
-
We highly recommend using only capital letters and numbers.
-
Avoid using the full organization name.
-
-
Click Save.

Expression 2: Email size limitation
In this step, you'll add a second expression to the Perception Point Redirect Rule.
Note: Amazon SES has a 40 MB maximum size limit. We recommend using a different file sharing service for larger files as a best practice. Messages larger than 40 MB will not trigger the rule, and therefore they will not be scanned. These un-scanned messages will be delivered to the specified recipients.
-
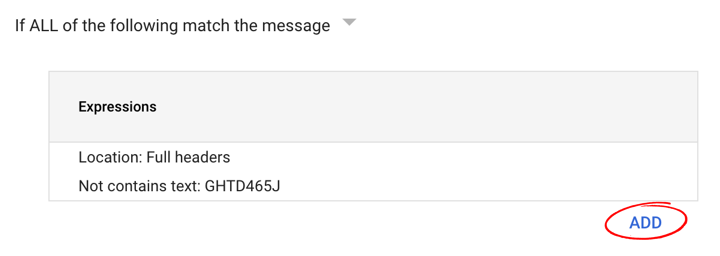
Under the Expressions box, click Add to add a new expression.

-
Specify the following details for the new expression:

-
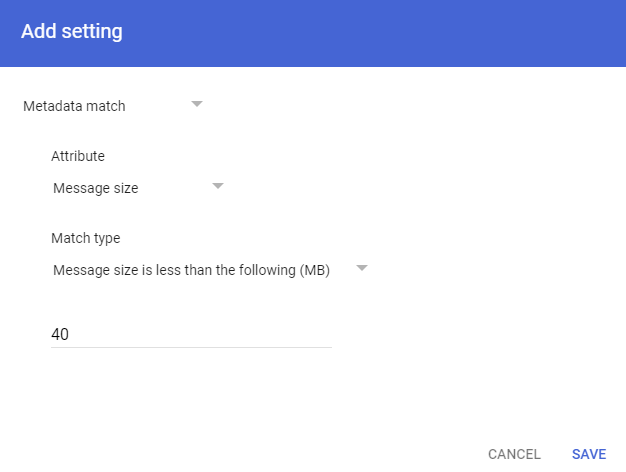
Metadata match
-
Attribute: Message size
-
Match type: Message size is less than the following (MB)
Important: Make sure that you select "less" and NOT "greater".

-
40
Important: Check again to make sure that you selected "less than" and NOT "greater than".
-
-
Click Save.
-
-
Complete the setting:
-
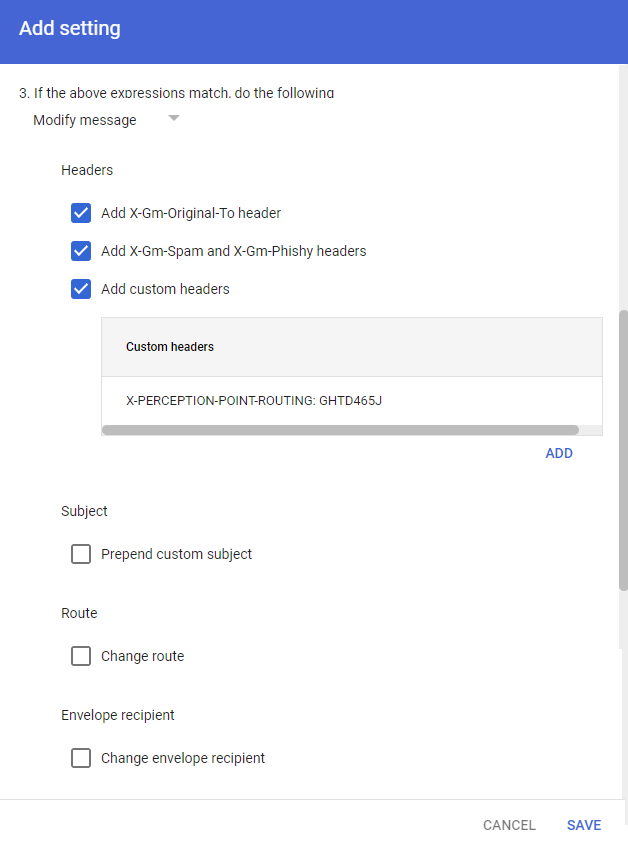
Under 3. If the above expressions match, do the following:

-
Select Modify message.
-
Under Headers:
-
Select Add X-Gm-Original-To header.
-
Select Add X-Gm-Spam and X-Gm-Phishy headers.
-
Select Add custom headers and click Add to add a header.
-
Header: X-PERCEPTION-POINT-ROUTING
Note: The "X-" is added to the expression automatically.
-
Value: The unique value that you created and entered for Content above. [see Expression 1: Unique header]
As per the example above, GHTD465J.
-
Click Save.
-
-
-
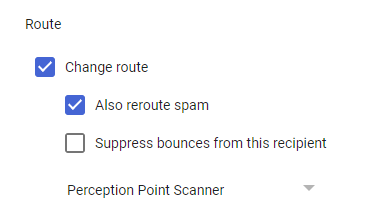
Scroll down to Route.

-
Select Change route.
-
[Optional] Select Also reroute spam.
-
From the drop-down menu, select Perception Point Scanner.
-
-
Scroll down to the bottom of the dialog box, and click Show options.

-
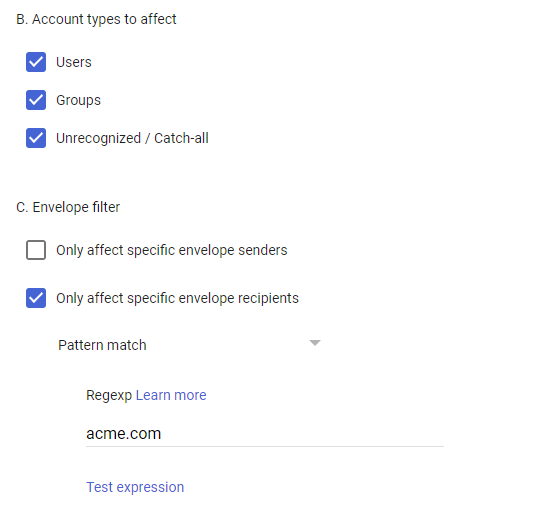
Under Account types to affect, select [all of the following]:
-
Users
-
Groups
-
(Unrecognized / Catch-all)
-
-
Specifying which users to protect [Google Workspace]
Note: After onboarding the Google Workspace integration, you can change the set of users that are protected by modifying the rule, as described below.
See above for the correct location inside the Google Admin console to perform the required configurations.
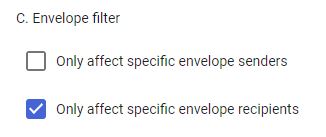
Under Envelope filter, select Only affect specific envelope recipients.
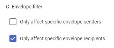
-
From the drop-down menu that appears below, select one of the following 3 options:
[This defines the users that will be protected by Perception Point X‑Ray.]
Applies to
Instructions
Pattern match
Domains and email addresses
Enter the domains or email addresses to protect.
Note: Make sure to use lower-case letters to specify the domains and email addresses. For example, specify "acme.com" and not "ACME.COM"
-
Multiple domains: Add the domains with a pipe symbol ["|"] between them, and without spaces between them.
-
Multiple email addresses: Add the email addresses with a pipe symbol ["|"] between them, and without spaces between them.
Group membership
Email groups
Click Select groups and then select the required group or groups to protect.
Single email address
A single email address
Enter the required [single] email address to protect.
Note: The email address is case-sensitive. To bypass the case-sensitivity, you can add (?i) before the email address. For example:
(?i)peter@acme.com
Note: If you select to not protect all of your domains, make sure to inform your Account Executive/VAR/CSM for Perception Point X‑Ray so that the correct billing arrangements will be implemented.
 See the available video.
 -
-
Click Add setting.
-
-
Click Save.
-


Email in Google Workspace is now protected by Perception Point X‑Ray. 
If you want to configure this Google Workspace integration to operate in monitoring mode, continue with Configuring monitoring mode below.
Configuring monitoring mode
|
Important: Perform this procedure only if you want your integration to operate in monitoring mode. Monitoring mode is typically used for PoC implementations. In monitoring mode [also known as passive, silent, or detection mode], Perception Point X‑Ray will not:
|
To configure the integration to operate in monitoring mode:
-
Open the Account > Bundles and Channels page.
-
On the right, click Default Channel Settings.
-
Click Edit [
 ].
]. -
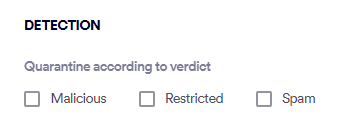
Under Detection, clear the Malicious, Restricted, and Spam check boxes.
-
Click Save.
-
Sign-in to the Google Admin console at admin.google.com.
-
Click Apps > Google Workspace > Gmail.
[Click here: https://admin.google.com/u/1/ac/apps/gmail/spam]
-
Scroll down to Spam, Phishing and Malware - and select it.
-
Locate Inbound gateway, hover over it, and click the Edit icon.
-
Under Message Tagging, clear the first check box.

Your Google Workspace Integration is now configured to operate in monitoring mode.
Perception Point X‑Ray will not quarantine any malicious emails or route spam to Junk folders.
See also: