This section describes how to configure Microsoft Entra ID [formerly known as Azure AD] as an identity provider.
- For general information about configuring identity providers, see Identity Provider [IdP] Integration - SSO [ABS].
- For details on how to configure a generic identity provider, see Identity Provider [IdP] Integration - Generic [ABS].
- For details on how to configure Okta as an identity provider, see Identity Provider [IdP] Integration - Okta [ABS].
This procedure includes the following:
|
Note The procedures below apply to the Azure AD version available in January 2021. Changes to the procedure may be required for newer versions of Azure AD or Entra ID. |
To configure Entra ID as the identity provider:
-
In the Advanced Browser Security console, open the Settings > Identity provider integration page.
-
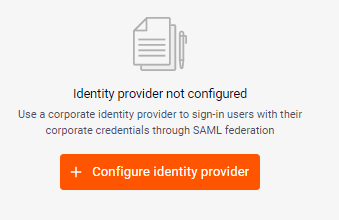
If no identity provider has been configured, click Configure identity provider. The first step of the wizard opens.
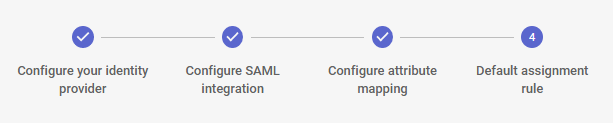
Step 1: Configure your identity provider

In this step, you'll give a name to the integration, and then copy configuration details from the Advanced Browser Security console to your identity provider.
-
Enter a name for the provider integration, for example, "Acme - Entra ID."
-
In Entra ID, go to Enterprise applications, and click New application.
-
Click Create your own application [in the top left corner]:
-
In What's the name of your app, enter a name for the new application, such as "Browser Extension."
-
Under "What are you looking to do with your application," make sure that "Integrate any other application you don't find in the gallery (Non-gallery)" is selected.
-
Click Create.
-
-
In Entra ID, click "2. Set up single sign on."
-
Click SAML.
-
In the "Basic SAML Configuration" box, click the Edit icon.
-
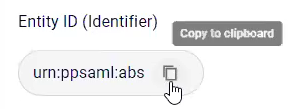
In the Advanced Browser Security console, click the copy icon to copy the "Entity ID (Identifier)" to the clipboard.
-
In Entra ID, paste the clipboard contents into the "Identifier (Entity ID)" field.
-
In the Advanced Browser Security console, click the copy icon to copy the "Reply URL (Assertion Consumer Service URL)" to the clipboard.

-
In Entra ID, paste the clipboard contents into the "Reply URL (Assertion Consumer Service URL)" field.
-
In Entra ID, click Save.
-
In the Advanced Browser Security console, click Next.
Step 2 - Configure SAML integration - opens.
Step 2: Configure SAML integration

In this step, you'll copy configuration details from Entra ID to the Advanced Browser Security console. The configuration details are contained in a metadata .xml file. A metadata .xml file is created by Entra ID when you add the new SAML integration. The .xml file contains information about Entra ID - that enables Advanced Browser Security to accept SAML assertions from Entra ID. The metadata .xml file can be stored either at a specified URL, or locally in the Advanced Browser Security console. It is recommended that you store the .xml file at a specified URL.
To store the metadata .xml file at a specified URL:
-
In Entra ID, in the step 3 "SAML Certificates" box, click the Copy icon to copy the "App Federation Metadata Url" to the clipboard.
-
In the Advanced Browser Security console, paste the clipboard contents into the "Metadata XML document URL" field.

-
Enter the Domain identifiers - that is the domains of the users that use this identity provider to sign-in.

-
Click Next.
Step 3 - Configure attribute mappings - opens.
Step 3: Configure the attribute mapping [optional]

In this step, you'll configure the attribute mappings between Advanced Browser Security and the identity provider. You'll need to perform this step only if you'll be assigning policies to users based on their user attributes.
Example - to map the user's department:
-
In the Advanced Browser Security console - step 3 - Configure attribute mappings - click Add new attribute.
-
In the Attribute column, enter Department.
-
In Entra ID, in the step 2 "Attributes & Claims" box, click Edit.
-
Locate the claim [key] that contains the user's department [typically user.department] - and then click the claim.
-
In the Manage claim screen, copy the Namespace to the clipboard.
-
In the Advanced Browser Security console, in the SAML claim column of the new attribute, paste the Namespace that you copied to the clipboard.
-
In Entra ID, in the Manage claim screen, copy the Name to the clipboard.
-
In the Advanced Browser Security console, in the SAML claim column of the new attribute, append a forward slash "/" and then insert the Name that you previously copied to the clipboard.
-
Click Next. Step 4 - Default assignment rules - opens.
Step 4: Assign policy
In this step, you will specify a policy that will be assigned to all new endpoint users.
-
Select a policy that will be assigned to new endpoint users.

-
Click Create integration.
Step 5: Completing the Configuration
You must now configure the users and groups for the application in Entra ID. You can either add specific users to Advanced Browser Security, or you can allow all users in the external identity provider to use the extension. To allow all users in the organization to access the extension, in Entra ID, under Properties, set "User assignment required" to No.
|
Note Some organizations use conditional access in Entra ID to restrict access to applications from only those devices that meet specific requirements. In certain circumstances, it is necessary to bypass these restrictions to enable access to the extension. For details, see Identity Provider Integration - Bypassing Conditional Access [ABS]. |
-
For details on how to add endpoint users using the Advanced Browser Security console, see Managing Endpoint Users. This enables you to assign a specific non-default policy to the new users before they first sign-in.
Summary of shared information
The table below summarizes the information that is shared between the Advanced Browser Security console and Entra ID.
|
Object |
Target |
|
|
From the Advanced Browser Security console to Entra ID |
||
|
2. Set up single sign on > SAML > Basic SAML Configuration:
|
|
|
From Entra ID to the Advanced Browser Security console |
||
|
|
|
|
|
|
See also:
