This page includes:
You can off-board [offboard] a Microsoft 365 Inline integration with "Acronis Email Security" either manually, or using a script.
-
Follow the procedures below to manually off-board a Microsoft 365 Inline integration with "Acronis Email Security".
-
For details about how to off-board a Microsoft 365 Inline integration using a script, see Off-boarding Microsoft 365 [Inline] - using a script.
-
For details about how to off-board a Microsoft 365 API integration with "Acronis Email Security", see Off-boarding Microsoft 365 [API].
Step 1: Preparing to off-board a Microsoft 365 Inline integration - manually
|
|
 See the available
 To off-board a Microsoft 365 Inline integration - manually:
-
In Microsoft 365 Defender, open the Security page.
-
Select Policies & rules.
-
Select Threat policies.
-
Under Policies, select Anti-spam.
Step 2: Removing the Fortinet IP addresses
-
Select Connection filter policy (Default) and then click Edit connection filter policy.
-
Under Always allow messages from the following IP addresses or address range, delete all the Fortinet IP addresses [see the table below].
Note: Remove the correct set of IP addresses - based on the environment of your organization.
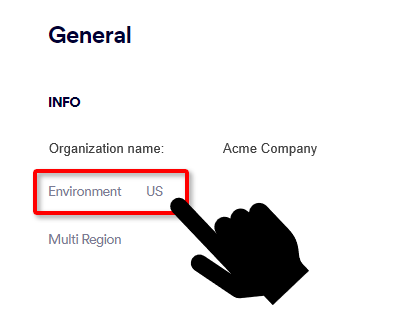
 What is the environment of your organization
-
In "Acronis Email Security", go to Settings > Account.
-
The Environment of your organization will appear under General > Info: US, EU, or AUS.
For US environments
For EU environments
For AUS environments
-
3.81.182.154
-
3.93.155.149
-
3.95.118.12
-
3.95.142.181
-
54.227.64.76
-
189.25.64.0/24
-
52.12.169.124 [required only if Muti-region is enabled]
-
99.81.216.78
-
34.249.190.60
-
108.128.137.108
-
99.80.189.20
-
176.23.157.0/24
-
52.12.169.124 [required only if Muti-region is enabled]
-
13.236.255.231
-
54.66.125.250
-
176.23.158.0/24
-
52.12.169.124 [required only if Muti-region is enabled]
-
-
If you don't have any further IP addresses, clear the "Enable safe list" check box.
-
Click Save.
-
Click Close.
Step 3: Deleting the rules
-
In the Exchange admin center, click Mail flow > Rules.
-
Select the Perception Point Redirect Rule.
-
Click Delete, and then click Confirm.
The rule may take a few seconds to be deleted.
-
Select Send Office 365 spam emails to Junk folder (High).
Note: It is possible that this rule does not exist in your organization.
-
Click Delete and then click Confirm.
The rule may take a few seconds to be deleted.
-
-
Select Send Office 365 spam emails to Junk folder (Low).
Note: It is possible that this rule does not exist in your organization.
-
Click Delete and then click Confirm.
The rule may take a few seconds to be deleted.
-
-
Select Perception Point Spam Rule.
-
Click Delete and then click Confirm.
The rule may take a few seconds to be deleted.
Step 4: Deleting the connectors
-
Open the Microsoft Exchange admin center and then click Mail flow > Connectors.
-
Select Disable IP Throttling on Perception Point Connector.
-
Click Delete and then click Confirm.
The connector may take a few seconds to be deleted.
-
Select Perception Point Scanning.
-
Click Delete and then click Confirm.
The connector may take a few seconds to be deleted.
Step 5: Deactivating the integration [Optional]
|
Important: Perform this step only if you want to deactivate "Acronis Email Security" for your organization. |
This step:
-
deactivates the integration
-
disables the "Acronis Email Security" remediation app. For details on the remediation app, see Remediation App.
-
deletes ALL inline domains
To deactivate the integration:
-
In "Acronis Email Security" - in the left navigation menu, select Settings > Bundles and Channels.
-
Under Enabled Channels, locate Email Service > Microsoft 365, and then click Deactivate on the right.
Important: When you click Deactivate, ALL verified inline domains will be deleted. Thereafter, emails will be rejected.
After a few minutes, "Acronis Email Security" will send "zero usage" to "Acronis". Check that the usage is zero.
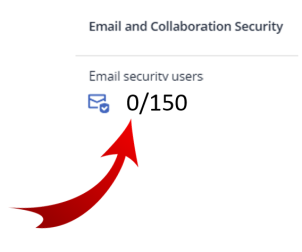
Don't proceed with the next step below until you see that the usage has been set to zero.
Step 6: Deactivating "Acronis Email Security" [Optional]
|
Important: Perform this step only if you want to deactivate "Acronis Email Security" for your organization. |
Perform this step only after you have verified that the usage has been set to zero, as described at the end of Step 5 above.
To deactivate Advanced Email Security, you may need to wait up to 24 hours after deactivating the integration. See Step 3 below.
-
Go to Acronis Cyber Protect Cloud > Protection.
-
Select the organization, click the 3-dots [
 ], and click Configure.
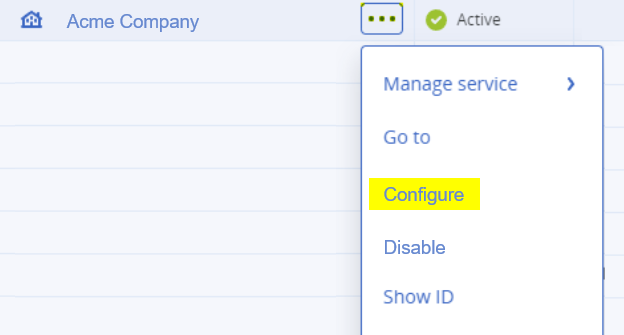
-
Click the Configure tab, and then scroll down to the Email and Collaboration Security section.
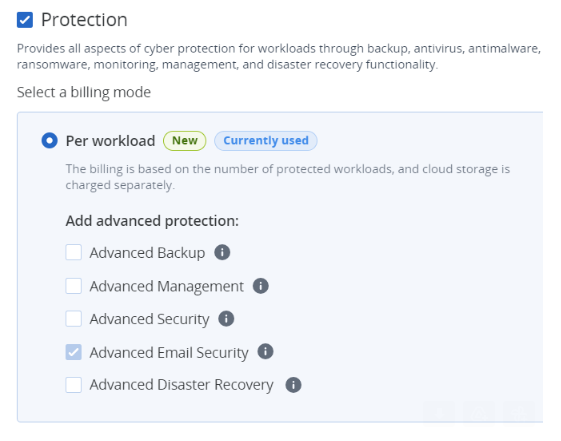
Note: In certain scenarios, the Email and Collaboration Security check box may be grayed-out [not available] for up to 24 hours after the integration is deactivated.
See also:
