This section includes:
About troubleshooting automatic onboarding - Microsoft 365
After you run the script to automatically configure a Microsoft 365 integration, you'll receive an email that indicates if the configuration was successful or not. If the configuration was not successful, try the following solutions, in the sequence presented below:
Step #1: Verifying the safelist is configured and is On
-
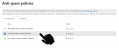
Inside Microsoft 365 Defender, go to the Anti-spam policies.
[Click here: https://security.microsoft.com/antispam]
-
Click "Connection filter policy (Default)"
-
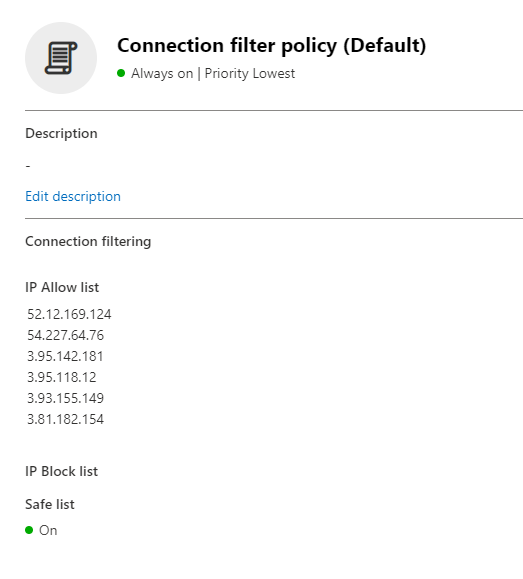
If you see the list of Perception Point IPs [under Allow list in the panel on the right], and that the Safe list is On, then the safelist is correctly configured.

Proceed to Step #2: Validation failure below.
Note that the allowed IPs may differ depending on the environment of your organization.
-
If the Safe list is Off, then:
-
Click "Edit connection filter policy"
-
Select the "Turn on Safe list" check box.
-
Click Save.
-
Make sure that Safe list is On.

-
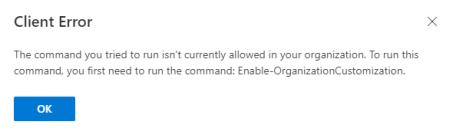
If Safe list is still Off, or if you see the error message below, wait at least 30 minutes, and then try to save again. If necessary, repeat this saving process 2 or 3 times, until the Safe list is On.
-
-
Once the Safe list is On, re-run the automatic onboarding script inside Perception Point X‑Ray.
-
Wait to receive an email that will indicate the status of the configuration.
-
If the email indicates that the configuration was still not successful, proceed with Step #2: Validation failure, below.

Step #2: Validation failure
If you have verified that the Safe list is correctly configured and is On [see Step #1: Verifying the safelist is configured and is On above], then continue with the procedure below:
-
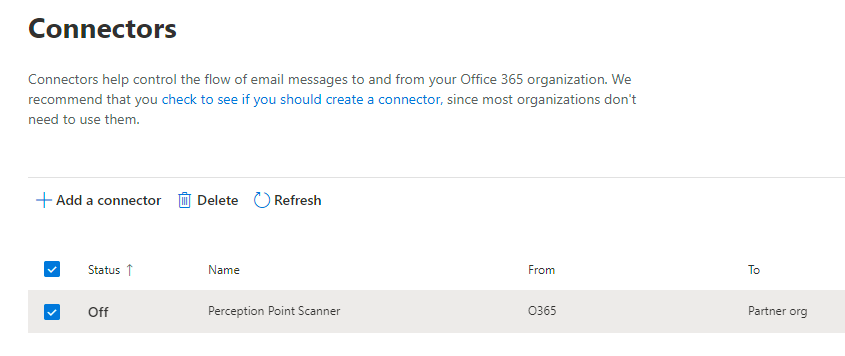
Inside the Exchange admin center, go to the Connectors page:
[Click here: https://admin.exchange.microsoft.com/#/connectors]

-
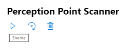
Select Perception Point Scanning.
-
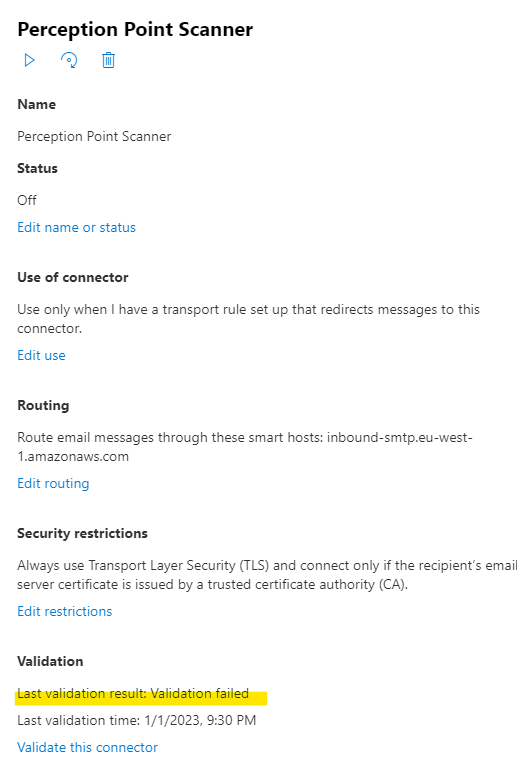
At the bottom of the panel that opens on the right, under Validation, look for Last validation result.

-
If the value is Validation successful, then continue with Step #3: Contact support, below.
-
If the value is Validation failed, then continue with the procedure below.
-
-
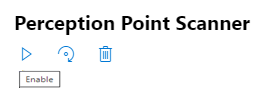
At the top of the panel on the right, click the Enable icon.
-
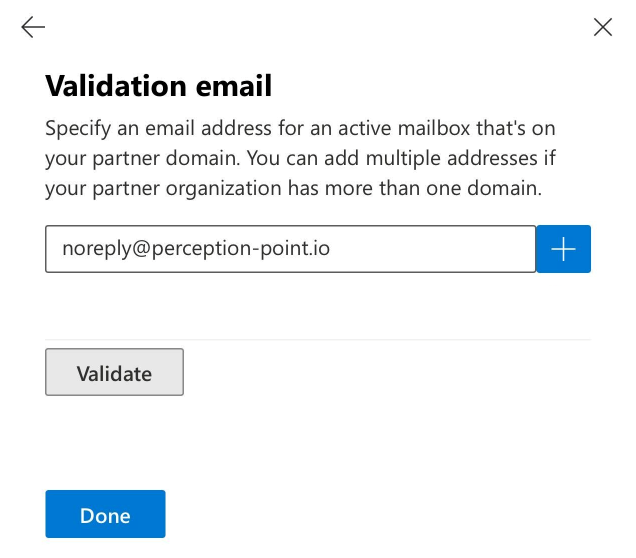
Click "Validate this connector" to manually validate the connector.

-
Enter this email to validate: noreply@perception-point.io
-
Click Validate.
-
Click Save.
-
Click Done.
-
Repeat the automatic onboarding procedure - that was previously unsuccessful - as described in Automatic configuration.
Important:
After you perform the onboarding procedure, if you receive an email that indicates that the configuration:
-
was successful - the configuration is now complete, and your organization is protected by Perception Point X‑Ray.
-
was still not successful - proceed with Step #3: Contact support, below.
-
Step #3: Contact support
If none of the options above resulted in a successful configuration, contact Perception Point Support [support@perception-point.io], or by using the chat feature in Perception Point X‑Ray.
See also:
