You can integrate FortiMail Workspace Security with Google Workspace. This enables FortiMail Workspace Security to protect all incoming mail.
This is the 2nd step of the procedure to integrate Google Workspace with FortiMail Workspace Security:
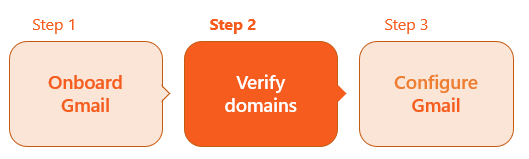

About verifying your domains
You need one or more verified domains for each email service that you integrate with FortiMail Workspace Security. After you add a domain [as part of the email service connection process], you need to verify the domain. Verifying a domain includes:
-
Adding a TXT record to your domain provider
-
Verifying the new TXT record
Sub-step 1: Adding a TXT record to your domain provider
|
Note:
|
To add a TXT record:
-
Make sure that the following page is displayed:
FortiMail Workspace Security > Settings > Protected Email Assets.
-
Under Inline Domains, locate and then open the required domain. The Primary Status should be "Pending verification".
-
Click the Copy icon [
 ] to copy the "Primary TXT record" > "Name" to the clipboard.
 -
Go to your domain provider and add the TXT record name, using the value that you copied to the clipboard.
-
Click the Copy icon [
] to copy the "Primary TXT record" > "Value" to the clipboard. -
Go to your domain provider and add the TXT record value, using the value that you copied to the clipboard.
Note
Other AWS products may use this method of domain verification. This is OK, as it is acceptable to have more than one _amazonses.domain record, as long as the record values are different.
Sub-step 2: Verifying the new TXT record
|
Note When you add a TXT record to your domain provider, it may take up to 72 hours for your domain provider to apply and replicate the change. Inform FortiMail Workspace Security Support [support@perception-point.io] if the domain is not verified after a few hours. |
To verify a new TXT record:
-
Open FortiMail Workspace Security.
-
In the left navigation menu, select Settings > Protected Email Assets.
-
Locate the required domain. It should show "Pending verification" as the "Primary Status".
-
Open the domain to display details about the domain.
-
Locate "TXT record verification".
-
Click Verify on the right of "TXT record verification".
After a period of time, the status should change from "Pending verification" to "Ready to configure".
A banner will appear at the top of the "Protected Email Assets" page, indicating that one-or-more domains need to be configured.
Note:
-
When you add a TXT record to your domain provider, it may take up to 72 hours for the domain provider to apply and replicate the change. If your domain verification status is still "Pending verification" after 72 hours - and can't be verified, see Troubleshooting domain verification.
-
If multi-region functionality is enabled, you'll need to verify TXT records for both the primary region and the secondary region. [see Multi-region]
-

|
You must now configure the Google Workspace integration. For details, see Step 3 - Configuring Google Workspace [Inline]. |
See also:
