You can integrate FortiMail Workspace Security with Microsoft Exchange. This enables FortiMail Workspace Security to protect all incoming mail.
This is the 3rd step of the procedure to integrate Exchange with FortiMail Workspace Security:
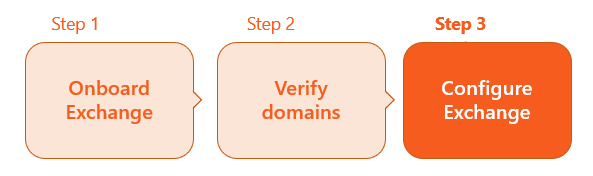

To enable your Exchange integration with FortiMail Workspace Security, some configurations must be made in your Exchange account. Perform these configurations as described below.
|
|
 See the available
 |
Note: The procedures below may differ slightly depending on the version of Microsoft Exchange that you are using. |
In Exchange 2016 and 2019, there is no Protection > Connection filter section, so you need to perform the following steps:
-
Connect with administrator credentials to the Exchange Server via a remote desktop connection.
-
Open the Exchange Management Shell.
-
Run the following command:
& $env:ExchangeInstallPath\Scripts\Install-AntiSpamAgents.ps1
-
Restart the Microsoft Exchange Transport service - using this command:
Restart-Service MSExchangeTransport
-
Specify the internal SMTP servers, using one of the following commands: [See the drop-down below for details on how to determine your environment]
 What is the environment of your organization
-
In FortiMail Workspace Security, go to Settings > Account.
-
The Environment of your organization will appear under General > Info: US, EU, or AUS.
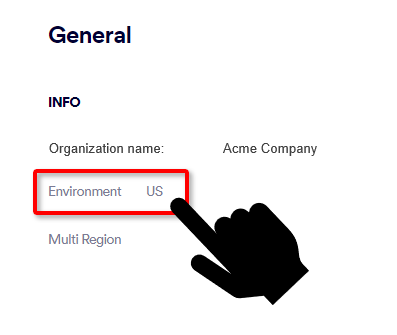
Multi-region is not enabled
US environments
Set-TransportConfig -InternalSMTPServers @{Add="3.81.182.154","3.93.155.149","3.95.118.12","3.95.142.181","54.227.64.76"}
EU environments
Set-TransportConfig -InternalSMTPServers @{Add="99.81.216.78","34.249.190.60","108.128.137.108","99.80.189.20"}
AUS environments
Set-TransportConfig -InternalSMTPServers @{Add="13.236.255.231","54.66.125.250"}
Multi-region is enabled
US environments
Set-TransportConfig -InternalSMTPServers @{Add="3.81.182.154","3.93.155.149","3.95.118.12","3.95.142.181","54.227.64.76","52.12.169.124"}
EU environments
Set-TransportConfig -InternalSMTPServers @{Add="99.81.216.78","34.249.190.60","108.128.137.108","99.80.189.20","52.12.169.124"}
AUS environments
Set-TransportConfig -InternalSMTPServers @{Add="13.236.255.231","54.66.125.250","52.12.169.124"}
Note: If you encounter SPF issues, add your local Exchange IPs into the relevant InternalSMTPServers command above.
-
-
To verify that the new IPs were registered, run this command:
Get-TransportConfig | Format-List InternalSMTPServers
![]() or
or
-
Depending on the environment of your organization, add the following IP addresses to the list of allowed IP addresses in your environment: [Open the drop-down below for details on how to determine your environment.]
What is the environment of your organization
-
In FortiMail Workspace Security, go to Settings > Account.
-
The Environment of your organization will appear under General > Info: US, EU, or AUS.
For US environments
For EU environments
For AUS environments
-
3.81.182.154
-
3.93.155.149
-
3.95.118.12
-
3.95.142.181
-
54.227.64.76
-
189.25.64.0/24
-
52.12.169.124 [required only if Muti-region is enabled]
-
99.81.216.78
-
34.249.190.60
-
108.128.137.108
-
99.80.189.20
-
176.23.157.0/24
-
52.12.169.124 [required only if Muti-region is enabled]
-
13.236.255.231
-
54.66.125.250
-
176.23.158.0/24
-
52.12.169.124 [required only if Muti-region is enabled]
-
-
In Exchange Admin, select Mail flow > Rules > "Create a new rule…"
-
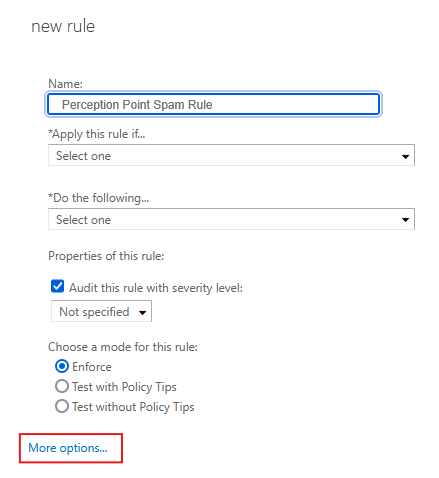
Enter a Name for the new rule: Perception Point Spam Rule
-
Scroll down and click "More options…"
-
Select "Apply this rule if…" > "A message header…" > "Matches these text patterns"
-
Select "Enter text" and then specify the header name: X-PERCEPTION-POINT-SPAM
-
Select "Enter text patterns" and then specify the following words or phrases: FAIL - and then click "+"
-
Select "Do the following…" > "Modify the Message Properties"
-
Set the Spam Confidence Level to "6"
Note:
Make sure that the default junk SCL threshold is set to 4 (the default).
-
To check the junk SCL threshold setting, run the following command:
Get-OrganizationConfig | Format-List SCLJunkThreshold
Spam will be sent to the user’s junk folder.
-
Recommendation: Changing MX records to FortiMail Workspace Security Inbound relayWhen updating the MX records to route emails through the FortiMail Workspace Security inbound relay, it is strongly recommended to follow the best practices that are shown below, to ensure optimal security and functionality:
|
|
Before changing or adding the MX record as described below, check if the domain that you're adding supports TLS encryption. If not, in FortiMail Workspace Security, disable TLS encryption for the domain. [See below for instructions.]
When you edit the TLS configuration in FortiMail Workspace Security, you can enable or disable TLS encryption. By default, TLS encryption is enabled, and FortiMail Workspace Security uses TLS version 1.2 - and not earlier versions. When TLS encryption is enabled, you can enable support for legacy versions as well [earlier than version 1.2].
In some cases, you may encounter an error similar to one of the following:
Note: When changing or adding the MX record, make sure that the MX record has the highest priority [0].
|
|||||||||||

-
If you have a firewall, make sure that the FortiMail Workspace Security IPs [shown below] are allow-listed in your firewall. The set of IPs varies depending on the environment in which your organization is located. [Open the drop-down below for details on how to determine your environment.]
What is the environment of your organization
-
In FortiMail Workspace Security, go to Settings > Account.
-
The Environment of your organization will appear under General > Info: US, EU, or AUS.
For US environments
For EU environments
For AUS environments
-
3.81.182.154
-
3.93.155.149
-
3.95.118.12
-
3.95.142.181
-
54.227.64.76
-
189.25.64.0/24
-
52.12.169.124 [required only if Muti-region is enabled]
-
99.81.216.78
-
34.249.190.60
-
108.128.137.108
-
99.80.189.20
-
176.23.157.0/24
-
52.12.169.124 [required only if Muti-region is enabled]
-
13.236.255.231
-
54.66.125.250
-
176.23.158.0/24
-
52.12.169.124 [required only if Muti-region is enabled]
-
-
On your network provider, change the MX record as follows:
What is the environment of your organization
-
In FortiMail Workspace Security, go to Settings > Account.
-
The Environment of your organization will appear under General > Info: US, EU, or AUS.
Multi-region enabled Multi-region not enabled For US environments
us.mx-pp.com
inbound-smtp.us-east-1.amazonaws.com
For EU environments
eu.mx-pp.com
inbound-smtp.eu-west-1.amazonaws.com
For AUS environments
australia.mx-pp.com
inbound-smtp.ap-southeast-2.amazonaws.com
-
Email in Microsoft Exchange is now protected by FortiMail Workspace Security. 
|
Note: After you have configured the Exchange integration, in the Bundles and Channels page, under Enabled Channels, Email Service will appear as Active. You are not required to activate the new integration.
|

Before changing or adding the MX record as described below, check if the domain that you're adding supports TLS encryption. If not, in FortiMail Workspace Security, disable TLS encryption for the domain. [See below for instructions.]
-
Non-TLS communication means that emails are sent as plain text, giving a "man-in-the middle" attacker the ability to monitor the network traffic. In contrast, TLS communication encrypts the emails while they are transmitted.
When you edit the TLS configuration in FortiMail Workspace Security, you can enable or disable TLS encryption. By default, TLS encryption is enabled, and FortiMail Workspace Security uses TLS version 1.2 - and not earlier versions. When TLS encryption is enabled, you can enable support for legacy versions as well [earlier than version 1.2].
See also: